LaserPlus Laser Measuring System
LaserPlus Laser Measuring System
A new laser measuring system provides repeatable measurement to 0.0001" and automatic machine compensation while reducing scrap during production of precision cutting tools. The ANCA LaserPlus is said to assure tight tolerances and grinding process stability.

A new laser measuring system provides repeatable measurement to 0.0001" and automatic machine compensation while reducing scrap during production of precision cutting tools. The ANCA LaserPlus is said to assure tight tolerances and grinding process stability.
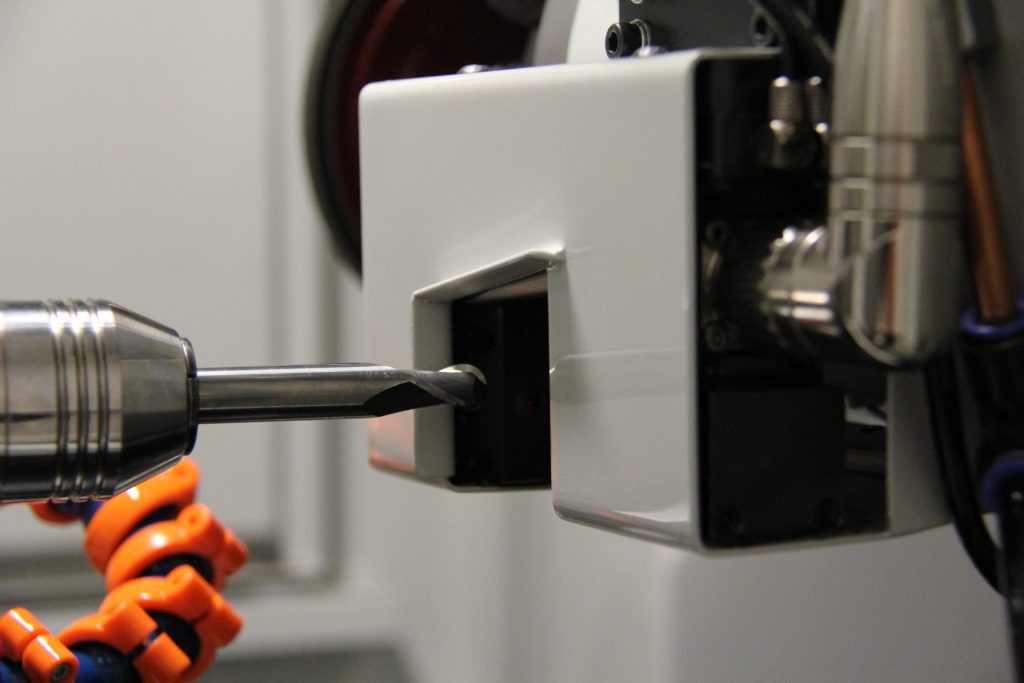
LaserPlus, an enhancement to the touch probe on ANCA's MX and TX grinding machines, uses a non-contact laser beam to accurately measure tool features in just seconds, including micro tools too small for touch probe measurement. The LaserPlus system can measure outside diameter, ball nose, corner radius and profile tools.
The laser is mounted inside the machine and will not interfere with the grinding processes while automatically measuring tools in the machine collet. LaserPlus can also reduce the need for off-line external measurement equipment, saving cost.
The laser measurement process is fully automated, including compensation for any out of tolerance conditions, thus supporting unmanned machine operation. The LaserPlus system can measure and maintain an accuracy to ± 0.002mm (0.0001") over a large batch of tools, measuring the top and bottom of the tool and checking tool runout. The maximum diameter the LaserPlus can accept for top and bottom measurement is 20mm (3/4").
To measure and control the OD of a cutting tool, a critical dimension, ANCA has interfaced the laser measurement with process control (SPC)">process control (SPC)">Statistical Process Control (SPC) software to monitor and control the OD. For example, the LaserPlus and SPC can successfully control the size of the diameter on a 6mm tool over a batch of 50 tools. During laser testing, a Cpk of 1.82 on a tolerance of +/- 0.005mm (0.0002") was achieved.
Assuring accurate laser measurements when using coolant in a mist-filled environment proved to be a challenge because residual oil imparts a film which may become opaque to the laser. The LaserPlus system includes two solutions: spinning the tool at specified intervals and different rotational speeds and using a compact air blast unit which aims a jet of air to disperse any residual oil from the tool. These two actions ensure the tool is free of any dirt or contaminates.
According to an ANCA spokesman, "LaserPlus provides a robust measurement solution with quick measurement times which will not significantly add to the grinding cycle time. A typical measurement cycle time for measuring the OD using SPC for a 6mm ball nose tools is 30 seconds (including eight seconds for the air blast)."
The laser has an IP (ingress protection) rating of 68 so it is protected from dust ingress and can withstand long-term immersion in liquids. The laser body consists of two turrets, one containing the transmitter optic and the other a receiver optic. A measurement is registered when the laser beam is interrupted. The laser optics is protected by a pneumatically operated shutter. Each shutter is closed during grinding and an air purge minimizes any contamination gathering around the optics.


