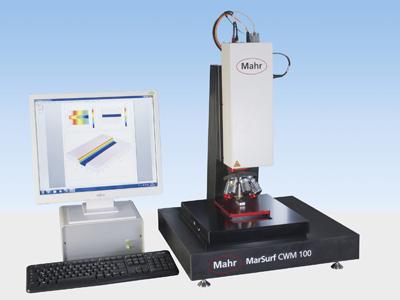
Mahr Federal has introduced two new optical surface measuring systems designed to provide fast non-contact 3D scanning and evaluation of very small to medium sized surface details on a wide range of components, including optics. The MarSurf WM 100 uses a white light interferometer, and the MarSurf CWM 100 includes both white light and confocal microscopy. The systems are designed for the measurement of optical, technical and reflecting surfaces, and to provide 3D topographical analysis where high information density is required, such as printed circuit boards.
"Ever higher levels of surface quality are being achieved in high precision optics and a wide range of other application areas. This has placed increased demands on non-contact measuring systems for improved resolution, speed, and measuring accuracy," said Pat Nugent, Vice President of Metrology Systems for Mahr Federal, the Mahr Group's U.S. headquarters. "To meet these growing needs, Mahr has dedicated an entire division to R&D, custom programming, and support at its manufacturing facility in Jena, Germany, a world renowned center for optics and the home of optics pioneers like Ernst Abbe."
The MarSurf CWM 100 and WM 100 provide highly accurate, non-contact measurement of surface structures with sub-nanometer resolution. Confocal microscopy is more adept at the measurement of dark surface structures, including the edges of small components, while white light interferometry is better suited to highly polished, shiny surfaces, including glass and optical surfaces.
The white light scanning sensor in both units is designed for fast-paced 3D roughness measurement, using real time video scanning technology for excellent, high-resolution reproduction of even microscopic surface details. It comes standard with a 20x lens, with others available ranging from 2.5x to 100x, and provides resolution down to 0.1 nm.
The confocal microscope available with the CWM 100 provides measurement of both 2D and 3D parameters to international standards along selectable surface lines or areal extracts. A 50x confocal lens is included, with others available. The CNC object table and Z-axis provide 100mm traversing range.
Measurement and evaluation are provided by easy-to-use Mountains for Mahr software, which allows surface views as profile section diagrams, topography, or 3D microscopy. Data can be imported and exported in differing formats, and the MarSurf aspheric option allows fast analysis of spherical and aspherical lenses.
Contact Details
Related Glossary Terms
- computer numerical control ( CNC)
computer numerical control ( CNC)
Microprocessor-based controller dedicated to a machine tool that permits the creation or modification of parts. Programmed numerical control activates the machine’s servos and spindle drives and controls the various machining operations. See DNC, direct numerical control; NC, numerical control.
- metrology
metrology
Science of measurement; the principles on which precision machining, quality control and inspection are based. See precision machining, measurement.
