 Grinding jobs requires strict tolerances. On grinding machines, the tolerances for the dimensions, form and position of finishing processes run tight, and in many cases, shops check these specifications against hard data. Part processing time increases if operators must move parts to and from external equipment to measure them and make corrections. By contrast, on-machine measurement and evaluation can enhance process reliability and productivity, particularly on small lot sizes.
For process evaluation, production engineers rely on a wide range of functions based on various principles of production measuring technology. For example, measurement of grinding force or comparative grinding spindle currents helps assess the service life of tools or determine fluctuating allowances that can affect process stability and compliance with required tolerances. Measurements also can prevent excessive dressing, which reduces tool life and increases tool costs.
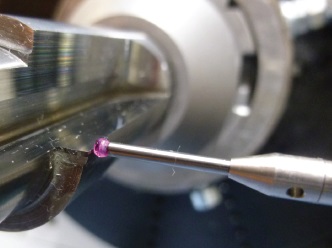
To limit grinding time or monitor the true-to-profile dressing process and its envelope curve functions, acoustic touch sensors assist with contact detection. Tactile measuring systems, which supports increased process reliability, include measurement and control systems for workpiece diameter or length, and pneumatic systems or microsensors for longitudinal expansions of spindle systems.
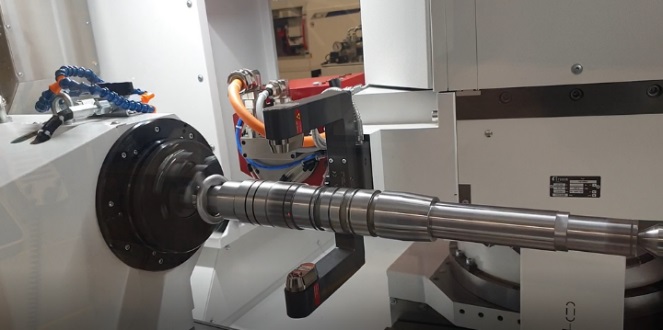
Cameras and laser systems provide measuring functions as well. Studer from United Grinding North America Inc. has built on laser measuring technology used in other industries such as the mechanical mounting of the required measuring device is similar to Studer B-axis measuring probes, which carry the relevant grinding spindle. The size of this measuring device adapts to workpiece diameter. To protect laser optics from the machine's coolant, the system uses the existing air nozzles that blow off the workpiece during measurement, along with newly developed dirt screens.
 Studer incorporates enhanced laser optics that can generate thousands of data points while the workpiece rotates, increasing the data set for evaluation and significantly reducing the time required for measurement. Integrated into measuring cycles, these features offer a suitable non-contact measuring method for precision workpieces.
Not only can the system record different diameters with a laser measuring device, it can carry out precise control measurements on "interrupted" diameters, such as shafts with keyways or longitudinal grooves, and toothed gears in the diameter range. This eliminates the setup and resetting required with previous tactile in-process gauging devices and dramatically increases efficiency as a result.
Operators can incorporate the measurement cycle after each machining operation or at the end of the overall grinding process. Studer software logs the measurement values per diameter after each measurement cycle, which enables operators to check component quality at a glance.
The complex machining of small batches of tools with PCD cutting edges offers an efficient example of the use of integrated measurement. The attributes of the material can make it difficult to determine whether the grinding wheel machines the tool or vice versa. Measurement of these tools often relies on tactile devices in a closed-loop process, which alternates between grinding and measuring in iterative stages to achieve diameter tolerances of ±1.5µm. Because PCD cutting edges can react to tactile measurement, non-contact alternatives have become increasingly important.
Now, integrated laser measuring technology can conduct non-contact measurement of tools with cutting edges or guide rails. The typical measuring tasks required in this sector, include:
A tool with cutting edges, on which the smallest and largest cutting-edge diameters are determined in a measuring plane.
Two planes of a cutting tool, with the different planes of the measuring cylinder generated by rotation, to provide the desired taper.
In most cases, laser optics can determine the diameter of cutting edges and guide rails of a cutting tool in the same measuring plane, even with the workpiece rotating, reducing measurement time. With the workpiece clamped before machining, Studer measuring cycles can determine the runout from the tool shaft to the cutting-edge diameter at the end of the tool.
This strategy of machine-integrated laser measuring technology expands the applications of process measurement in grinding machines. Precise, universal non-contact measurement supports shops in their efforts to increase the efficiency of precision machining and reduce the time required to achieve these effective results.
For more information on Studer, phone 937-859-1975 or visit www.grinding.com.
Contact Details
Related Glossary Terms
- coolant
coolant
Fluid that reduces temperature buildup at the tool/workpiece interface during machining. Normally takes the form of a liquid such as soluble or chemical mixtures (semisynthetic, synthetic) but can be pressurized air or other gas. Because of water’s ability to absorb great quantities of heat, it is widely used as a coolant and vehicle for various cutting compounds, with the water-to-compound ratio varying with the machining task. See cutting fluid; semisynthetic cutting fluid; soluble-oil cutting fluid; synthetic cutting fluid.
- dressing
dressing
Removal of undesirable materials from “loaded” grinding wheels using a single- or multi-point diamond or other tool. The process also exposes unused, sharp abrasive points. See loading; truing.
- grinding
grinding
Machining operation in which material is removed from the workpiece by a powered abrasive wheel, stone, belt, paste, sheet, compound, slurry, etc. Takes various forms: surface grinding (creates flat and/or squared surfaces); cylindrical grinding (for external cylindrical and tapered shapes, fillets, undercuts, etc.); centerless grinding; chamfering; thread and form grinding; tool and cutter grinding; offhand grinding; lapping and polishing (grinding with extremely fine grits to create ultrasmooth surfaces); honing; and disc grinding.
- grinding wheel
grinding wheel
Wheel formed from abrasive material mixed in a suitable matrix. Takes a variety of shapes but falls into two basic categories: one that cuts on its periphery, as in reciprocating grinding, and one that cuts on its side or face, as in tool and cutter grinding.
- polycrystalline diamond ( PCD)
polycrystalline diamond ( PCD)
Cutting tool material consisting of natural or synthetic diamond crystals bonded together under high pressure at elevated temperatures. PCD is available as a tip brazed to a carbide insert carrier. Used for machining nonferrous alloys and nonmetallic materials at high cutting speeds.
- precision machining ( precision measurement)
precision machining ( precision measurement)
Machining and measuring to exacting standards. Four basic considerations are: dimensions, or geometrical characteristics such as lengths, angles and diameters of which the sizes are numerically specified; limits, or the maximum and minimum sizes permissible for a specified dimension; tolerances, or the total permissible variations in size; and allowances, or the prescribed differences in dimensions between mating parts.


