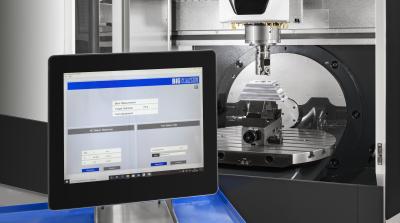
BIG KAISER Precision Tooling has released a new closed-loop boring system featuring an intelligent, fully automatic fine boring head. This system, when used in conjunction with in-process measuring systems, can automatically compensate for cutting edge wear, resulting in less scrap, improved accuracy and considerable time savings.
The EWA68 boring head has a travel range of .866” on diameter, and with the smallest insert holder, it covers the range of Ø2.677-3.543”. This means that similar-sized bores on the same part could be produced with a single boring head. With the addition of two larger insert holders, the range can be extended up to Ø5.197”.
Integration options for existing machine tools is accomplished with the use of an external industrial PC to handle the machine control communications and EWA boring head adjustment. Newer machine tool controls may be suited to handle the EWA software directly to achieve more seamless integration.
For lower level integration where in-process gaging is not present, a third option for implementation exists where the boring head adjustment is performed through manual data input into a tablet or mobile device that is used to control the boring head movement.
Contact Details
Related Glossary Terms
- boring
boring
Enlarging a hole that already has been drilled or cored. Generally, it is an operation of truing the previously drilled hole with a single-point, lathe-type tool. Boring is essentially internal turning, in that usually a single-point cutting tool forms the internal shape. Some tools are available with two cutting edges to balance cutting forces.
- boring head
boring head
Single- or multiple-point precision tool used to bring an existing hole within dimensional tolerance. The head attaches to a standard toolholder and a mechanism permits fine adjustments to be made to the head within a diameter range.
- in-process gaging ( in-process inspection)
in-process gaging ( in-process inspection)
Quality-control approach that monitors work in progress, rather than inspecting parts after the run has been completed. May be done manually on a spot-check basis but often involves automatic sensors that provide 100 percent inspection.

