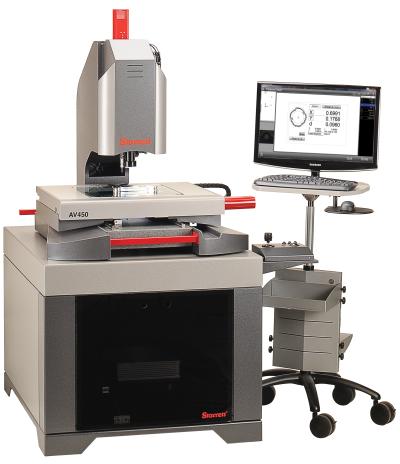
The L.S. Starrett Company has introduced its AV450 Automatic Vision System. Versatile, accurate, fast,and American made, the new 3-axis vision system allows users to cost-effectively achieve high throughput in their inspection process, and is suitable for both repetitive, larger part-run applications and routine quality assurance.
Featuring a larger X,Y,Z measuring envelope of 18" x 14" x 8" (457 mm x 356 mm x 203 mm), the Starrett AV450 has high-resolution video zoom optics and it can be preprogrammed (CNC) for repetitive part inspection or driven manually via a trackball for individual measurements. With its highly stable mechanical design and precision linear bearings, smooth stage motion, maximum performance and throughput is easily attainable. Throughput is further enhanced by either QC5000 or MetLogix M3 software that controls video edge detection and multiple-channel fiber optic or LED illumination. Computer-controlled Quadrant (LED) ring lighting, substage lighting, and optional through-the-lens lighting meets the most challenging illumination requirements.
Accuracy of the Starrett AV450 Automatic Vision System is 2.5 + 5L/1000 and reading resolution is 4 µin (0.1µm). Magnification on a 24” monitor, 1:1 pixel setting is 37x to 240x 6.5:1 zoom and 25x to 300x with a 12:1 zoom. The system has a 1.3 mega-pixel color digital video camera and a precision granite base.
The AV450 has an external motion control unit and includes a Windows-based operating system with an operator interface via a desktop PC with a 24” touchscreen monitor, as well as Wi-Fi network connectivity. CAD files can be imported/ exported and reports can be generated and archived. M3 metrology software supports 3-axis measurements and 2D geometric constructs (such as points, lines, angles, rectangles and slots) and corrections for level, skew and datum origin. Touch-screen functionality with a pinch, swipe and touch provides intuitive operation for all users.
Options for the AV450 include a Renishaw touch probe kit, Optimet laser probe, 0.5x, 1.5x and 2.0x auxiliary lenses, an LED dark-field quadrant illuminator and a DXF/ field-of-view option for automatic comparison to CAD files. Other options include a CNC rotary axis fixture, touch probe change rack, calibration standards, part fixtures and workholding devices.
Contact Details
Related Glossary Terms
- calibration
calibration
Checking measuring instruments and devices against a master set to ensure that, over time, they have remained dimensionally stable and nominally accurate.
- computer numerical control ( CNC)
computer numerical control ( CNC)
Microprocessor-based controller dedicated to a machine tool that permits the creation or modification of parts. Programmed numerical control activates the machine’s servos and spindle drives and controls the various machining operations. See DNC, direct numerical control; NC, numerical control.
- computer-aided design ( CAD)
computer-aided design ( CAD)
Product-design functions performed with the help of computers and special software.
- fixture
fixture
Device, often made in-house, that holds a specific workpiece. See jig; modular fixturing.
- metrology
metrology
Science of measurement; the principles on which precision machining, quality control and inspection are based. See precision machining, measurement.
- quality assurance ( quality control)
quality assurance ( quality control)
Terms denoting a formal program for monitoring product quality. The denotations are the same, but QC typically connotes a more traditional postmachining inspection system, while QA implies a more comprehensive approach, with emphasis on “total quality,” broad quality principles, statistical process control and other statistical methods.
- vision system
vision system
System in which information is extracted from visual sensors to allow machines to react to changes in the manufacturing process.
