Tips and tricks for CNC machining
When machining for precision, there's no such thing as planning too much. There are many important aspects to account for, from bit tapers to material burrs to caliper readings. Even what direction you attach your material to the stage can matter. Here are some quick tips to keep in mind as you plan your next machining project.
Contributed by Connie Yu
When machining for precision, there’s no such thing as planning too much. There are many important aspects to account for, from bit tapers to material burrs to caliper readings. Even what direction you attach your material to the stage can matter. Below are some quick tips to keep in mind as you plan your next machining project (go to https://www.instructables.com/id/CNC-Machining-Tips-and-Tricks/ for the full walkthrough of tips and explanations).
First is considering how to optimize your mill. If applicable, replace the original stage with a heavier metal plate to minimize vibrations in the system. You still want to use a softer material as your final sacrificial block so as not to interfere with over-cutting. For example, you could attach a large block of aluminum as your stage but put an acrylic block on top of it like in the figure below.
When you desig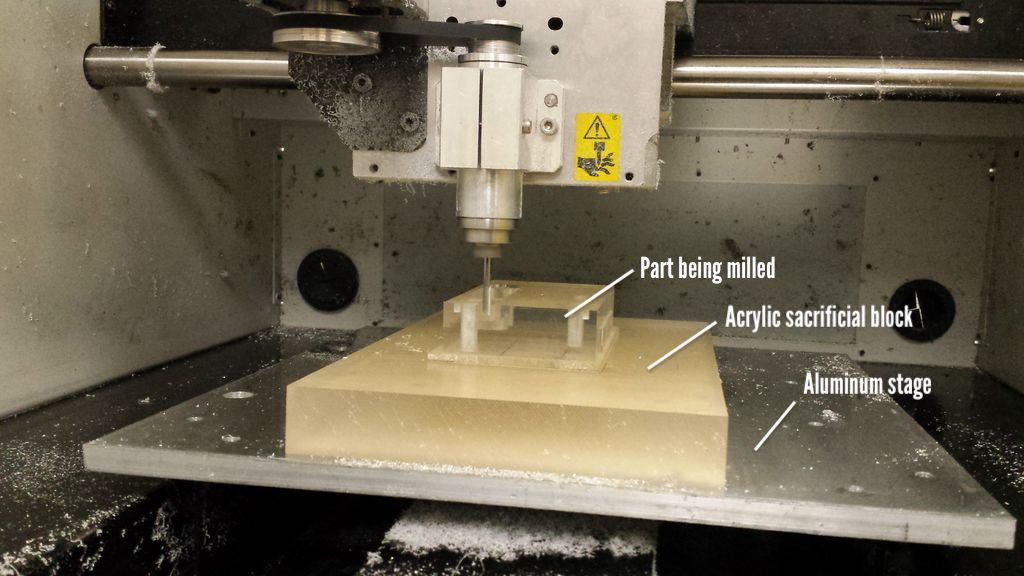 n your part, first consider how you plan to mill it. What features should be cut in the same pass? When you have alignment dowel holes in your model for perfect flipping, you want the important features milled on the same surface as the alignment holes. This is because even flipping your material or changing end mill introduces possibilities of error, so it’s safer to just use the same pass to be sure that they are correctly positioned relative to each other. Sometimes you may want to have through hole dowel holes for this purpose: you may need features on opposite faces correctly positioned relative to each other, so you should mill the alignment holes in the same pass as the first face’s features before flipping.
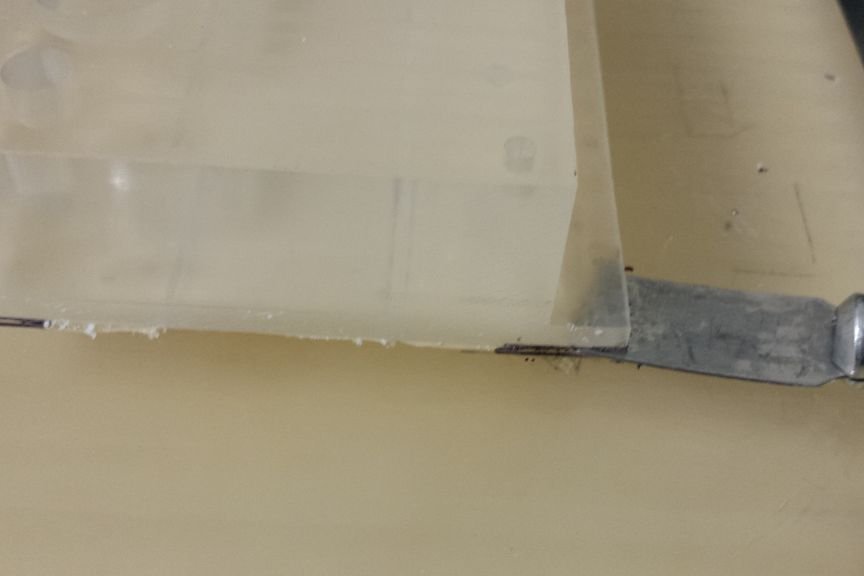
Then when mounting material, always use calipers to get the actual thickness of your material because even material suppliers may occasionally be out of spec. But even with calipers, check multiply places because you’ll get fluctuating caliper readings from thicker or thinner sections of the material. Deciding on which reading to use is up to the accuracy your job requires: you can be conservative or go for the middle ground. File down the edges of your material to remove burring that may interfere with having full contact with the milling stage. If using tape, be sure to apply tape all over the bottom surface for optimal adhesion, and keep your tape symmetric so that your block won’t be slightly slanted (remember that tape has finite thickness too). If possible, align your material’s extrusion direction perpendicular to the X-axis. This applies for extruded materials like polyethylene and aluminum, but not for acrylic because that’s usually casted. This is because variations in the material are generally perpendicular to the extrusion direction, but more importantly: surfacing in the X direction is recommended for stability. The stage is usually limited to Y motion so it has no freedom to move in X. This is also good advice for removing your material for the stage: always push your chisel/spatula/etc. along the axis perpendicular to the direction that your stage moves in. Avoid pushing the stage along its direction of freedom, as this may shift your XY origin. You can see in the image below that I also tend to target the corners, since they’re easier to pry up, but I still insert from the left or right (perpendicular to Y axis) and push along the X axis.
 Before cutting harder materials like aluminum (depends on your mill’s power: some mills consider aluminum soft…), sometimes it’s a good idea to apply a thin layer of cutting fluid as a lubricant and coolant. Ironically, if you use a lot of fluid it can also lead to chip build-up, which traps heat close to where you’re milling. That’s one reason not to overuse cutting fluid: use soap to remove any excess (and remove it from the sacrificial block if it drips down, since as a lubricant it interferes with adhesion of the tape). In the image below, you can see that the use of cutting fluid caused the chips to clump up and trap heat around the milling location. This is usually not too big of a concern unless temperature rises up enough to shatter your end mill or material, which is very unlikely for small jobs but still something to be conscious of for the longevity of your bits.
Go o gone is used to remove sticky residue from your tape (mainly left behind when your end mill cuts too deep and hits the tape, tearing it up) on the sacrificial block or even your end mill. It’s great to remove the residue but be careful not to overdo it: goo gone will be hard to clean off, making it harder for tape to stick down in future applications. Hot water and soap are best for washing off goo gone because it’s organic, but in any case: always be sure that you wipe down the sacrificial block THOROUGHLY to remove all goo gone. If your subsequent pieces keep getting kicked off the mill since it isn’t stuck down hard enough, it’s possibly because there’s goo gone residue.
Knowing the specs of your end mills, consider how far down you need to cut in your model. End mills can only cut so deep until there are no more flutes for cutting, so this may be a problem if you have deep holes. There are exceptions: when using the 1/8″ end mill, for example, the cutting depth is 3/8″ but the shaft is the same diameter as the fluted regions so you can continue cutting beyond 3/8″ as long as you don’t need to cut vertically more than 3/8″. You can’t do this for end mills whose fluted regions are smaller in diameter than the shaft because the program for the tool paths doesn’t account for this, so the taper of your end mill might run into your material. This is also a problem when you are milling out tall objects: the taper and/or collet connected to your end mill might run into your material because the shaft is only so long. See the image below: when I was milling that block of polyethylene, I realized that I couldn’t just rough completely down because the remaining material (tall parts that you see) might interfere and ram into the collet. Thus, I had to rough out that section as well, though to 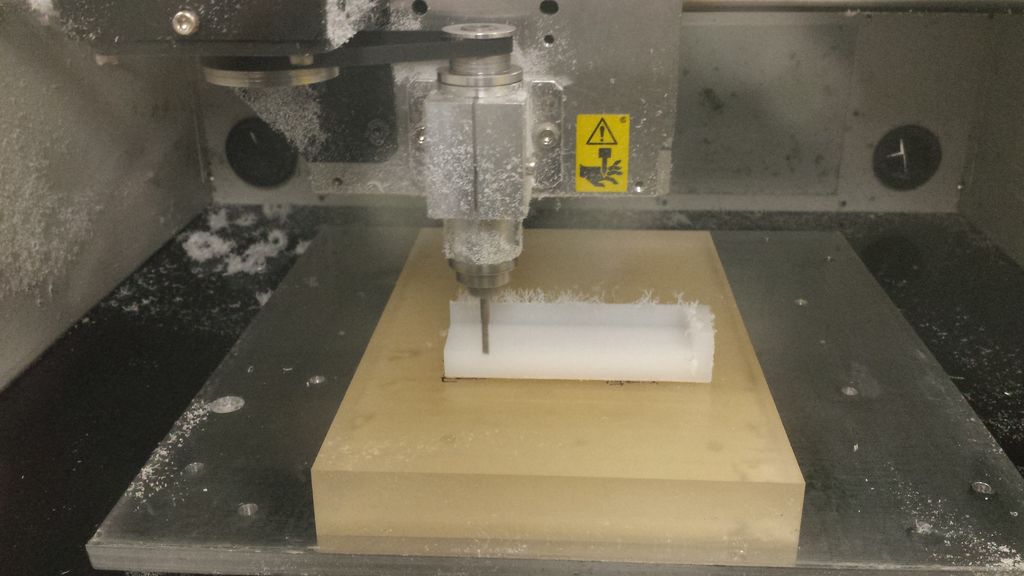 save time in hindsight I should have just used a band saw to cut down the material before mounting it.
These are only a handful of tips to keep in mind in case it is applicable to your project.
