As the plans for more and more machined metal parts include numerical surface finish specifications, the need diminishes to visually qualify that a part has, for example, “a mirror finish with no burrs” or to have the machinist with the finest touch scratch the surface with his fingernail to make sure it’s “matte and rough.”
“When you see a print where it spells out what cutoff length, stylus tip size and filters to use, then you know that whoever put together that print really understands what he’s putting on the print and not just grandfathering it in,” said Len Carravallah, sales engineer for form products at Mitutoyo America Corp., Aurora, Ill., who works out of the company’s Plymouth, Mich., office. The company offers contact-based instruments that range from ones for performing basic measurements on easy-to-access, flat, noncontoured surfaces to automated, 5-axis CNC measuring machines.

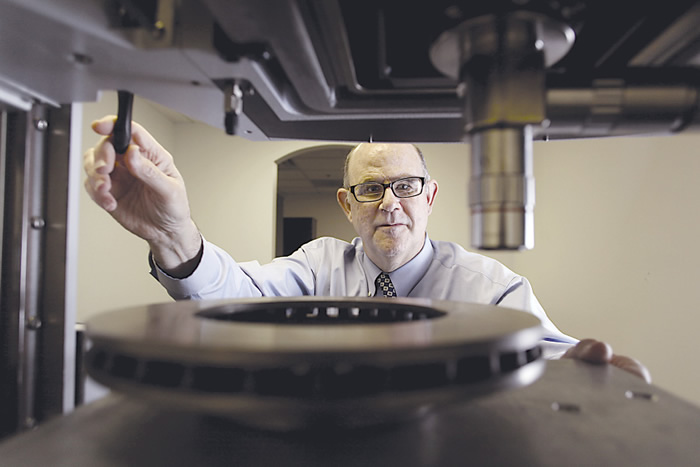
Michigan Metrology’s Donald Cohen operates the NPFlex 3D optical profiler from Bruker. Image courtesy Michigan Metrology.

Some surfaces—such as a delicate micropart—can be negatively impacted if a stylus transverses them, and so an alternative method is needed. Bruker Corp. is one company that offers equipment for both contact and noncontact measurement of surface roughness and texture. In addition to avoiding surface damage, noncontact measurement can gather more information. “A noncontact method can enable you to get details from a surface that have to do with the surface texture direction that you may not be able to pick up with a single stylus trace,” said Matt Novak,
director of applications development for Bruker Nano Surfaces Div., Tucson, Ariz.
From Rough to Wavy
One company that uses Bruker measurement equipment is Michigan Metrology LLC. Donald Cohen founded the Livonia, Mich., company about 22 years ago and uses 3D surface microtexture measurement and analysis to help engineers and scientists solve problems related to squeaks, leaks, friction, wear, appearance and adhesion. “Those are the key issues,” he said.
Cohen uses the Bruker NPFlex white-light, vertical-scanning interferometer, which provides a high-resolution, 3D image of the surface. The surface is typically measured over a field of view of 1mm × 1mm (0.039"×0.039"). The height resolution is typically 3nm to 6nm in the vertical-scanning mode and less than 0.3nm in the phase-shifting mode.
Cohen noted a significant issue in the industry is determining the correct spatial wavelengths to measure. “In the past, everybody had stylus profilometers and they were almost hardwired to a particular cutoff length, a 0.8mm cutoff length,” he said, adding that this means any spatial wavelength, such as a sine wave on a part’s surface, that is 0.8mm (0.315") or shorter is called roughness. Wavelengths greater than 0.8mm would be called “waviness.”
Cohen added: “The trouble is, that’s not always the case. It depends on the application. It depends on the part shape. There is nothing magical about 0.8mm as a cutoff between roughness and waviness.”

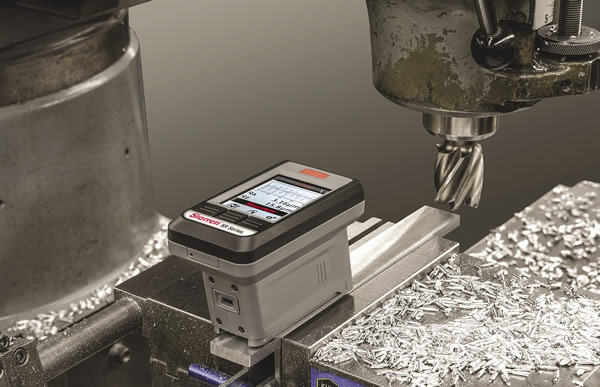
A Starrett SR series roughness tester is used to measure the finish of a machined surface. Image courtesy L.S. Starrett.

For instance, it would be a challenge to measure surface roughness on gear teeth using a 0.8mm cutoff because the part feature is often too narrow, he explained. On the other end of the spectrum, the waviness of a machined part might be measured in millimeters.
“We’re trying to get away from using words like ‘roughness’ and ‘waviness’ and just specify the spatial wavelength, usually short wavelength or long wavelength, which then defines a bandwidth,” Cohen said.
He cited a familiar example of measuring the roughness of a mountain range, which would have a roughness value that’s quite large based on the difference between the highest peak and the lowest valley. If the mountains have grass on them and someone removes the grass and measures the roughness again, the roughness measurement would be the same because the grass contributes very little to the overall roughness of the mountains.
“What I just described is what goes on in the electropolishing industry,” Cohen said. “They have a surface with some mountains on it and it might not look real shiny. Then they electropolish it, which is like removing the grass, but the big mountains are still there.”

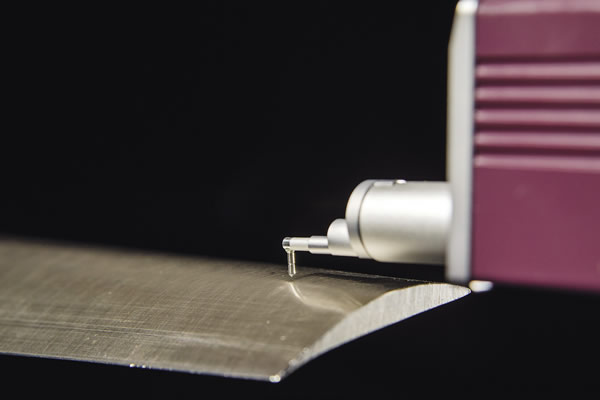
A surface is measured with the Formtracer SV-C3200 system from Mitutoyo America. Image courtesy Mitutoyo America.

After measuring the average roughness with the typical 0.8mm cutoff, no change occurs. “That’s a huge problem that I work on throughout the year,” Cohen said. “I just polished this thing; why isn’t the roughness changing? Well, you took the grass off but didn’t get rid of the mountains.”
To solve the problem, electropolishers and other part finishers must decide whether or not those mountains are important, he said. If they are, another process is needed to remove the mountains. If not, all that matters is whether the mountains are shiny or not.
“So now, to measure the roughness, you need to measure it over shorter wavelengths,” Cohen added. “That’s filtering out the mountains. You don’t measure the mountains.”
Form is also part of the surface-texture lexicon and is an even longer wavelength, Cohen said. Form might be the shape of a part, such as a cylinder.
“When you consider the general shape, then the form is the base shape, i.e., a cylinder, and a few undulations of the surface around the total cylinder may be considered a form error, typically called ‘roundness,’ ” Cohen stated. “The cylindrical shape is the form, and the deviation from an ideal cylinder would be considered the form deviation. Once you remove the ideal cylinder shape, you’re left with the deviations over some spatial wavelength that you have to define. Below that spatial wavelength is roughness and waviness.”
He added that although, historically, words like roughness, waviness and roundness have been used to describe a surface, going forward the concepts of spatial wavelength and undulations per revolution for form will be used instead.
Profile Parameters
When measuring surface roughness, Ra (roughness average) is a common profile parameter, but one that provides limited information because it averages all the peaks and valleys.
“Ra is a very generic way to look at a surface,” added Mitutoyo’s Carravallah, noting the parameter is not widely used in Europe and Asia. “It gives you the warm, fuzzy feeling that I’m measuring the part correctly, but it doesn’t tell you a whole lot about the surface.”
As a case in point, Bruker’s Novak pointed out that a surface with numerous, randomly distributed small peaks could have the same Ra as a surface that has the same number of small peaks but are all positioned on one side of the surface. However, if the surface is a mating one in a functional assembly, a surface with all the peaks on one side may not mate as effectively as a surface that has a random distribution of peaks. That requires understanding how a part will function in a system and calling out the proper control and the surface texture and not just the roughness, he said.
Nonetheless, describing roughness can be difficult to comprehend, but is necessary, according to Michael Butler, product manager for precision hand tools at L.S. Starrett Co., Athol, Mass. “It’s important for machinists when they’re looking at a print and there’s a callout for a certain finish that they understand a little bit of the foundational principles behind it, because what it will enable them to do is interact more effectively with design engineers.”
Those engineers can create incredible efficiencies in the components they design by taking a deeper look at the interaction between surfaces, such as when there’s a need to increase adhesion or to reduce friction, but they may not understand the challenges and costs of actually manufacturing the surfaces, according to Butler. “Oftentimes, a machinist has an incredible amount of knowledge that a design engineer, frankly, doesn’t,” he said.
The list of surface roughness profile parameters is long and looks like alphabet soup, but all the parameters have their place, based on what surface description is required. “They are just ways to describe the surface,” Butler said.
For example, a skew parameter such as Rsk says something about surface symmetry. “For a surface that tends to be dominated by peaks, the skew will be positive,” said Michigan Metrology’s Cohen. “If it’s dominated by valleys, the skew will be negative.”

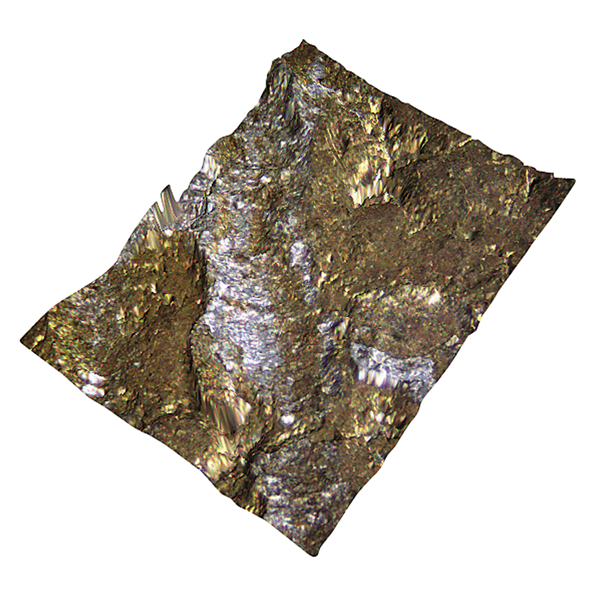
Measured using the Contour Elite 3D optical microscope from Bruker, this 3D image of a copper ring shows a color image overlay. Image courtesy Bruker Nano Surfaces.

Another set of parameters tells about the spacing on the surface, Cohen added. “A good one is RSm [mean spacing of profile irregularities]. That tells you how far apart the peaks are along the profile.”
In addition, hybrid parameters tend to take into account spacing and height deviations. According to Cohen, a good one is delta Q. Dq is the root mean square (RMS) slope on a surface. “The slope depends on both spacing and amplitude,” he said. “You get all kinds of information from that.”
For that hybrid parameter, imagine two roller coasters. If the entire track of roller coaster No. 1 went up and down in one cycle over a specific length, while roller coaster No. 2, which has the same length, went up and down 10 times, the Ra would be the same for the two but the spacing and slope would be different, Cohen explained. “The RMS slope, the rate of change in the surface, would be very high for the one that has multiple undulations versus the one that doesn’t. It’s another way to pick up how quickly the surface is changing.”
Space is the Place
Adding to the parameter soup is the letter S, such as Sa, the analogous parameter in the 3D space for the 2D Ra. When using a noncontact, optical device to enable 3D measurement, Cohen said end users see the entire surface relative to the part rather than a line trace across the surface. “Like one person said when I was demonstrating this equipment, he could finally see what he was measuring.”
Nonetheless, the adoption of 3D measurement is somewhat slow—but usage is growing, according to Bruker’s Novak. “A lot of people still make do with 2D parameters, or profile-type data, but are finding they can’t get to the root cause of a performance problem,” he said, noting that drives manufacturers to start looking at noncontact, or larger-area, measurement.
Novak added that optical surface measurement systems provide results that are independent of the operator. “Because you’re measuring over a wider area, you’re not so critically tied to the position of the stylus trace,” he said.
For the majority of end users who measure surface roughness, Butler said Starrett offers three main stylus-based roughness testers: SR160, SR300 and SR400. While the diamond stylus is integral on the SR160, the base model, the styli on the SR300 and SR400 are exposed and contact the surface being measured. This contact provides the user with more information and enhanced analysis of the results, according to Butler. The radius of a diamond stylus is from 5µm to 10µm, and it is critical to maintain the integrity of that sensitive component.
“Probably the most common issue we have is a bad stylus that needs to be replaced,” he said.
Another way to distinguish stylus-based surface measurement instruments is whether they are skidded or skidless. Mitutoyo’s Carravallah explained that skidded units are primarily for measuring flat surfaces while skidless ones, which read the high-frequency wavelength for roughness and the low-frequency wavelength for waviness, are also suitable for surfaces with radii and contours. “Wt is a waviness parameter,” he said. “Once the Wt parameter comes out, we know we are in a skidless application.” In addition, Mitutoyo’s skidded instruments have a Z-axis stylus travel of only 360µm, compared to 800µm for its skidless instruments.
When determining surface roughness, the ultimate goal is to have testing be part of the manufacturing process on the shop floor.
“It would be ideal to measure the part as you’re cutting it and then have the instrument feedback. That would be sweet,” Cohen said. “In the real high-end polishing operations of the optics world, I’ve heard of it being done.”

Contributors
Bruker Nano Surfaces Div.
(520) 741-1044
www.bruker.com/nano
L.S. Starrett Co.
(888) 674-7443
www.starrett.com
Michigan Metrology LLC
(866) 953-5030
www.michmet.com
Mitutoyo America Corp.
(888) 648-8869
www.mitutoyo.com
Contact Details
Contact Details
Contact Details
Related Glossary Terms
- computer numerical control ( CNC)
computer numerical control ( CNC)
Microprocessor-based controller dedicated to a machine tool that permits the creation or modification of parts. Programmed numerical control activates the machine’s servos and spindle drives and controls the various machining operations. See DNC, direct numerical control; NC, numerical control.
- cutoff
cutoff
Step that prepares a slug, blank or other workpiece for machining or other processing by separating it from the original stock. Performed on lathes, chucking machines, automatic screw machines and other turning machines. Also performed on milling machines, machining centers with slitting saws and sawing machines with cold (circular) saws, hacksaws, bandsaws or abrasive cutoff saws. See saw, sawing machine; turning.
- flat ( screw flat)
flat ( screw flat)
Flat surface machined into the shank of a cutting tool for enhanced holding of the tool.
- metrology
metrology
Science of measurement; the principles on which precision machining, quality control and inspection are based. See precision machining, measurement.
- polishing
polishing
Abrasive process that improves surface finish and blends contours. Abrasive particles attached to a flexible backing abrade the workpiece.
- surface texture
surface texture
Repetitive or random deviations from the nominal surface, which form 3-D topography of the surface. See flows; lay; roughness; waviness.
- waviness
waviness
The more widely spaced component of the surface texture. Includes all irregularities spaced more widely than the instrument cutoff setting. See flows; lay; roughness.

