Careful consideration when implementing inspection processes yields efficiencies.
Manufacturers continually search for ways to increase profits and reduce costs. Trying to find cost savings where chips are made makes sense and is usually where the most-significant improvements are found. However, efficiency gains can also be made in nonvalue-adding areas, like inspection.
Introducing new parts to production often requires new inspection processes and measuring tools. An inspection process should be considered as carefully as a new manufacturing process. Inefficient, cumbersome and inaccurate inspection devices can hamstring a manufacturing process.


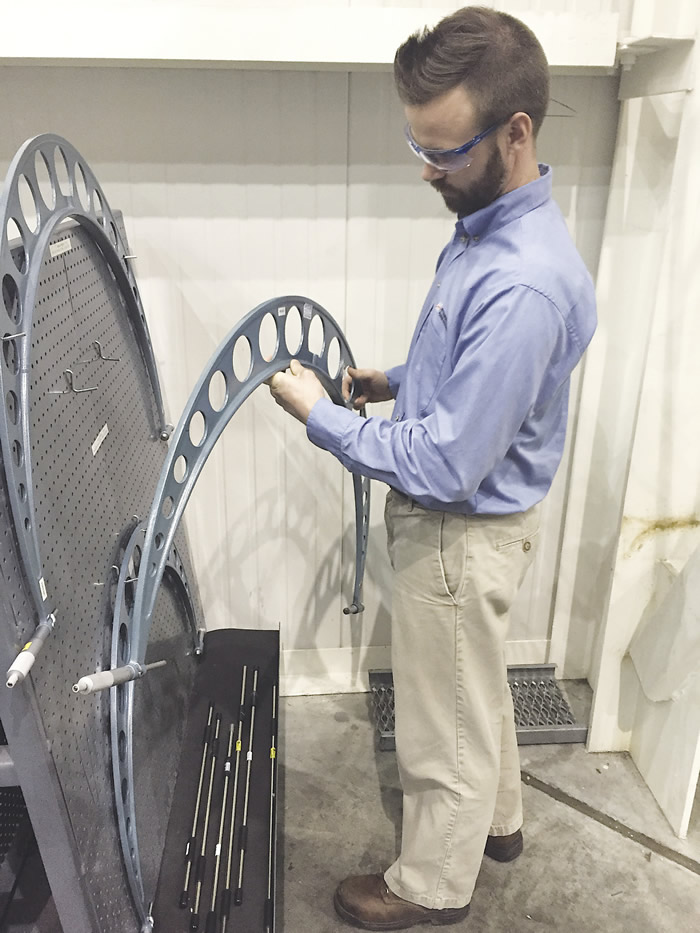
Joel Johnson, a quality engineer at Mitsubishi Hitachi Power Systems, checks calibration stickers on large micrometers used to measure the journals of gas turbine rotors. All images courtesy C. Tate.

For example, a former employer manufactured a family of parts in various lot sizes. Machinists were required to change from producing one part to another throughout the day. The company spent several weeks overcoming setup issues, tooling problems and other inefficiencies. It eventually reduced changeover time from a few hours to 5 minutes.
Unfortunately, the inspection process utilized a scanning technology that is better suited for R&D than production. Scanning each part took 45 minutes, and machinists could not begin the next run until they had received acceptable inspection data. Therefore, the benefit of the 5-minute changeover was not fully realized. The company eventually purchased a small coordinate measuring machine with a tactile-scanning capability to collect the necessary data. This reduced the inspection process from 45 to 5 minutes.
The Usual Suspect
Choosing the wrong measuring tool is a common problem and can cost companies significant amounts of money. For experienced metalworking professionals, selecting the best measuring instrument for a job often feels like a simple task and defaulting to past experience is often viewed as a sure way to achieve success. However, doing so without validation can prove detrimental.
Most of the time our instincts are correct—but not always. In one instance, I recall machine operators needed to measure IDs from 10” to 14” (254mm to 355.6mm). They only needed to measure three or four parts per day and tolerances were not very tight, so I selected what I thought were tried-and-true ID micrometers. There was a problem, though, because the parts were not round after machining, and ID mics don’t work well on out-of-round parts. I found the 10” to 14” ID mics were difficult to read because the machinists had to place them deep inside the part. Several erroneous measurements were made because the micrometer graduations were difficult to see. These errors, in turn, led to reworking parts that did not need it, along with production delays as we rechecked measurement data.
I incorrectly assumed similar tools I had previously applied would be sufficient. I should have taken the time to investigate the process and validate the tools and their measurements before buying them. Similar to cutting and machine tools, it is wise to consult with experts and test the functionality of measurement tools in-process before buying them.
Progress Proceeds
Measuring instruments are constantly advancing technologically and becoming more affordable. When these technologies are combined with a little creativity, it is possible to produce some very elegant solutions to part-measurement problems. CMMs, for example, can communicate with other machines, allowing automatic correction based on measured values.
I worked with one small CMM where measurement data was fed to a spreadsheet, which flagged out-of-tolerance measurements and provided the necessary steps to correct the machine. We not only gained efficiency from reduced measuring times, we also reduced the opportunity for mistakes when adjusting for out-of-tolerance conditions.


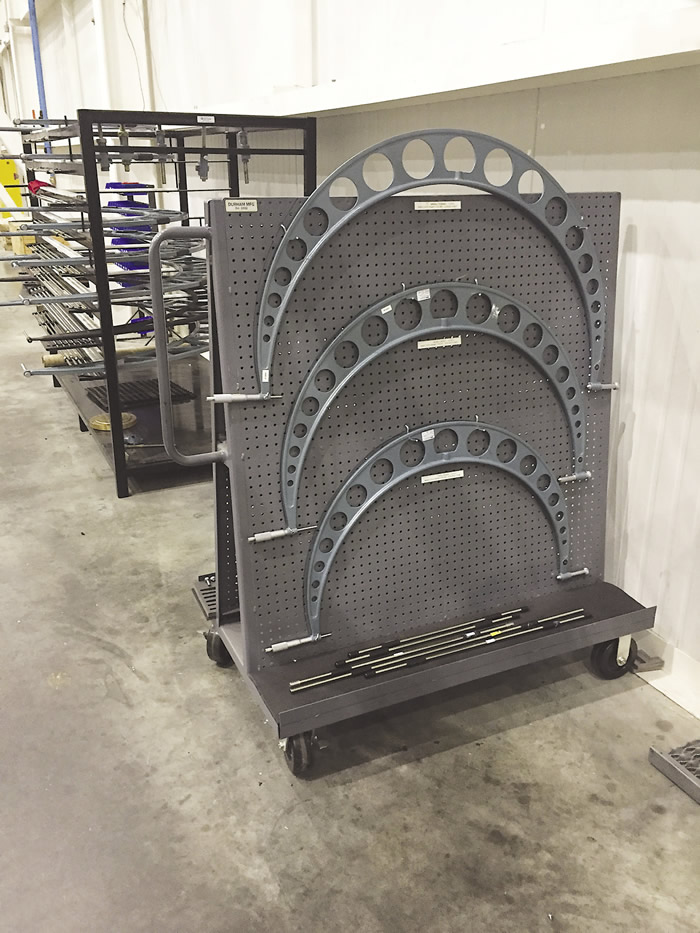
Large parts require large measuring tools, such as these micrometers used to measure turned diameters on large gas turbine components.

Despite technological advancements, training personnel to properly use measuring devices is the surest way to drive measurement efficiency. An effective training program teaches proper device selection, use and care. Whether it is a simple micrometer or a costly CMM, proper techniques have been established to obtain accurate and reliable results.
Proper training also includes the measurement process. Having each person on the team follow a prescribed process will help reduce measurement variation. When working in the aerospace industry, I experienced a situation where one inspector consistently reported that the measurements for the machined parts were good while another inspector consistently reported the parts failed inspection. After some investigation, the company found the inspector who reported having good parts had not been trained to follow established procedures. As a result, all the parts reported to be good were later found to deviate from the specification.
Unfortunately, measurement is often the last thing considered when setting up a manufacturing process, but it must be given the same consideration as all others. This includes testing and validating to ensure maxiumum efficiency. Failure to test and validate will prevent a parts manufacturer from realizing the productivity gains needed to remain competitive.
Related Glossary Terms
- calibration
calibration
Checking measuring instruments and devices against a master set to ensure that, over time, they have remained dimensionally stable and nominally accurate.
- family of parts
family of parts
Parts grouped by shape and size for efficient manufacturing.
- inner diameter ( ID)
inner diameter ( ID)
Dimension that defines the inside diameter of a cavity or hole. See OD, outer diameter.
- metalworking
metalworking
Any manufacturing process in which metal is processed or machined such that the workpiece is given a new shape. Broadly defined, the term includes processes such as design and layout, heat-treating, material handling and inspection.
- micrometer
micrometer
A precision instrument with a spindle moved by a finely threaded screw that is used for measuring thickness and short lengths.


