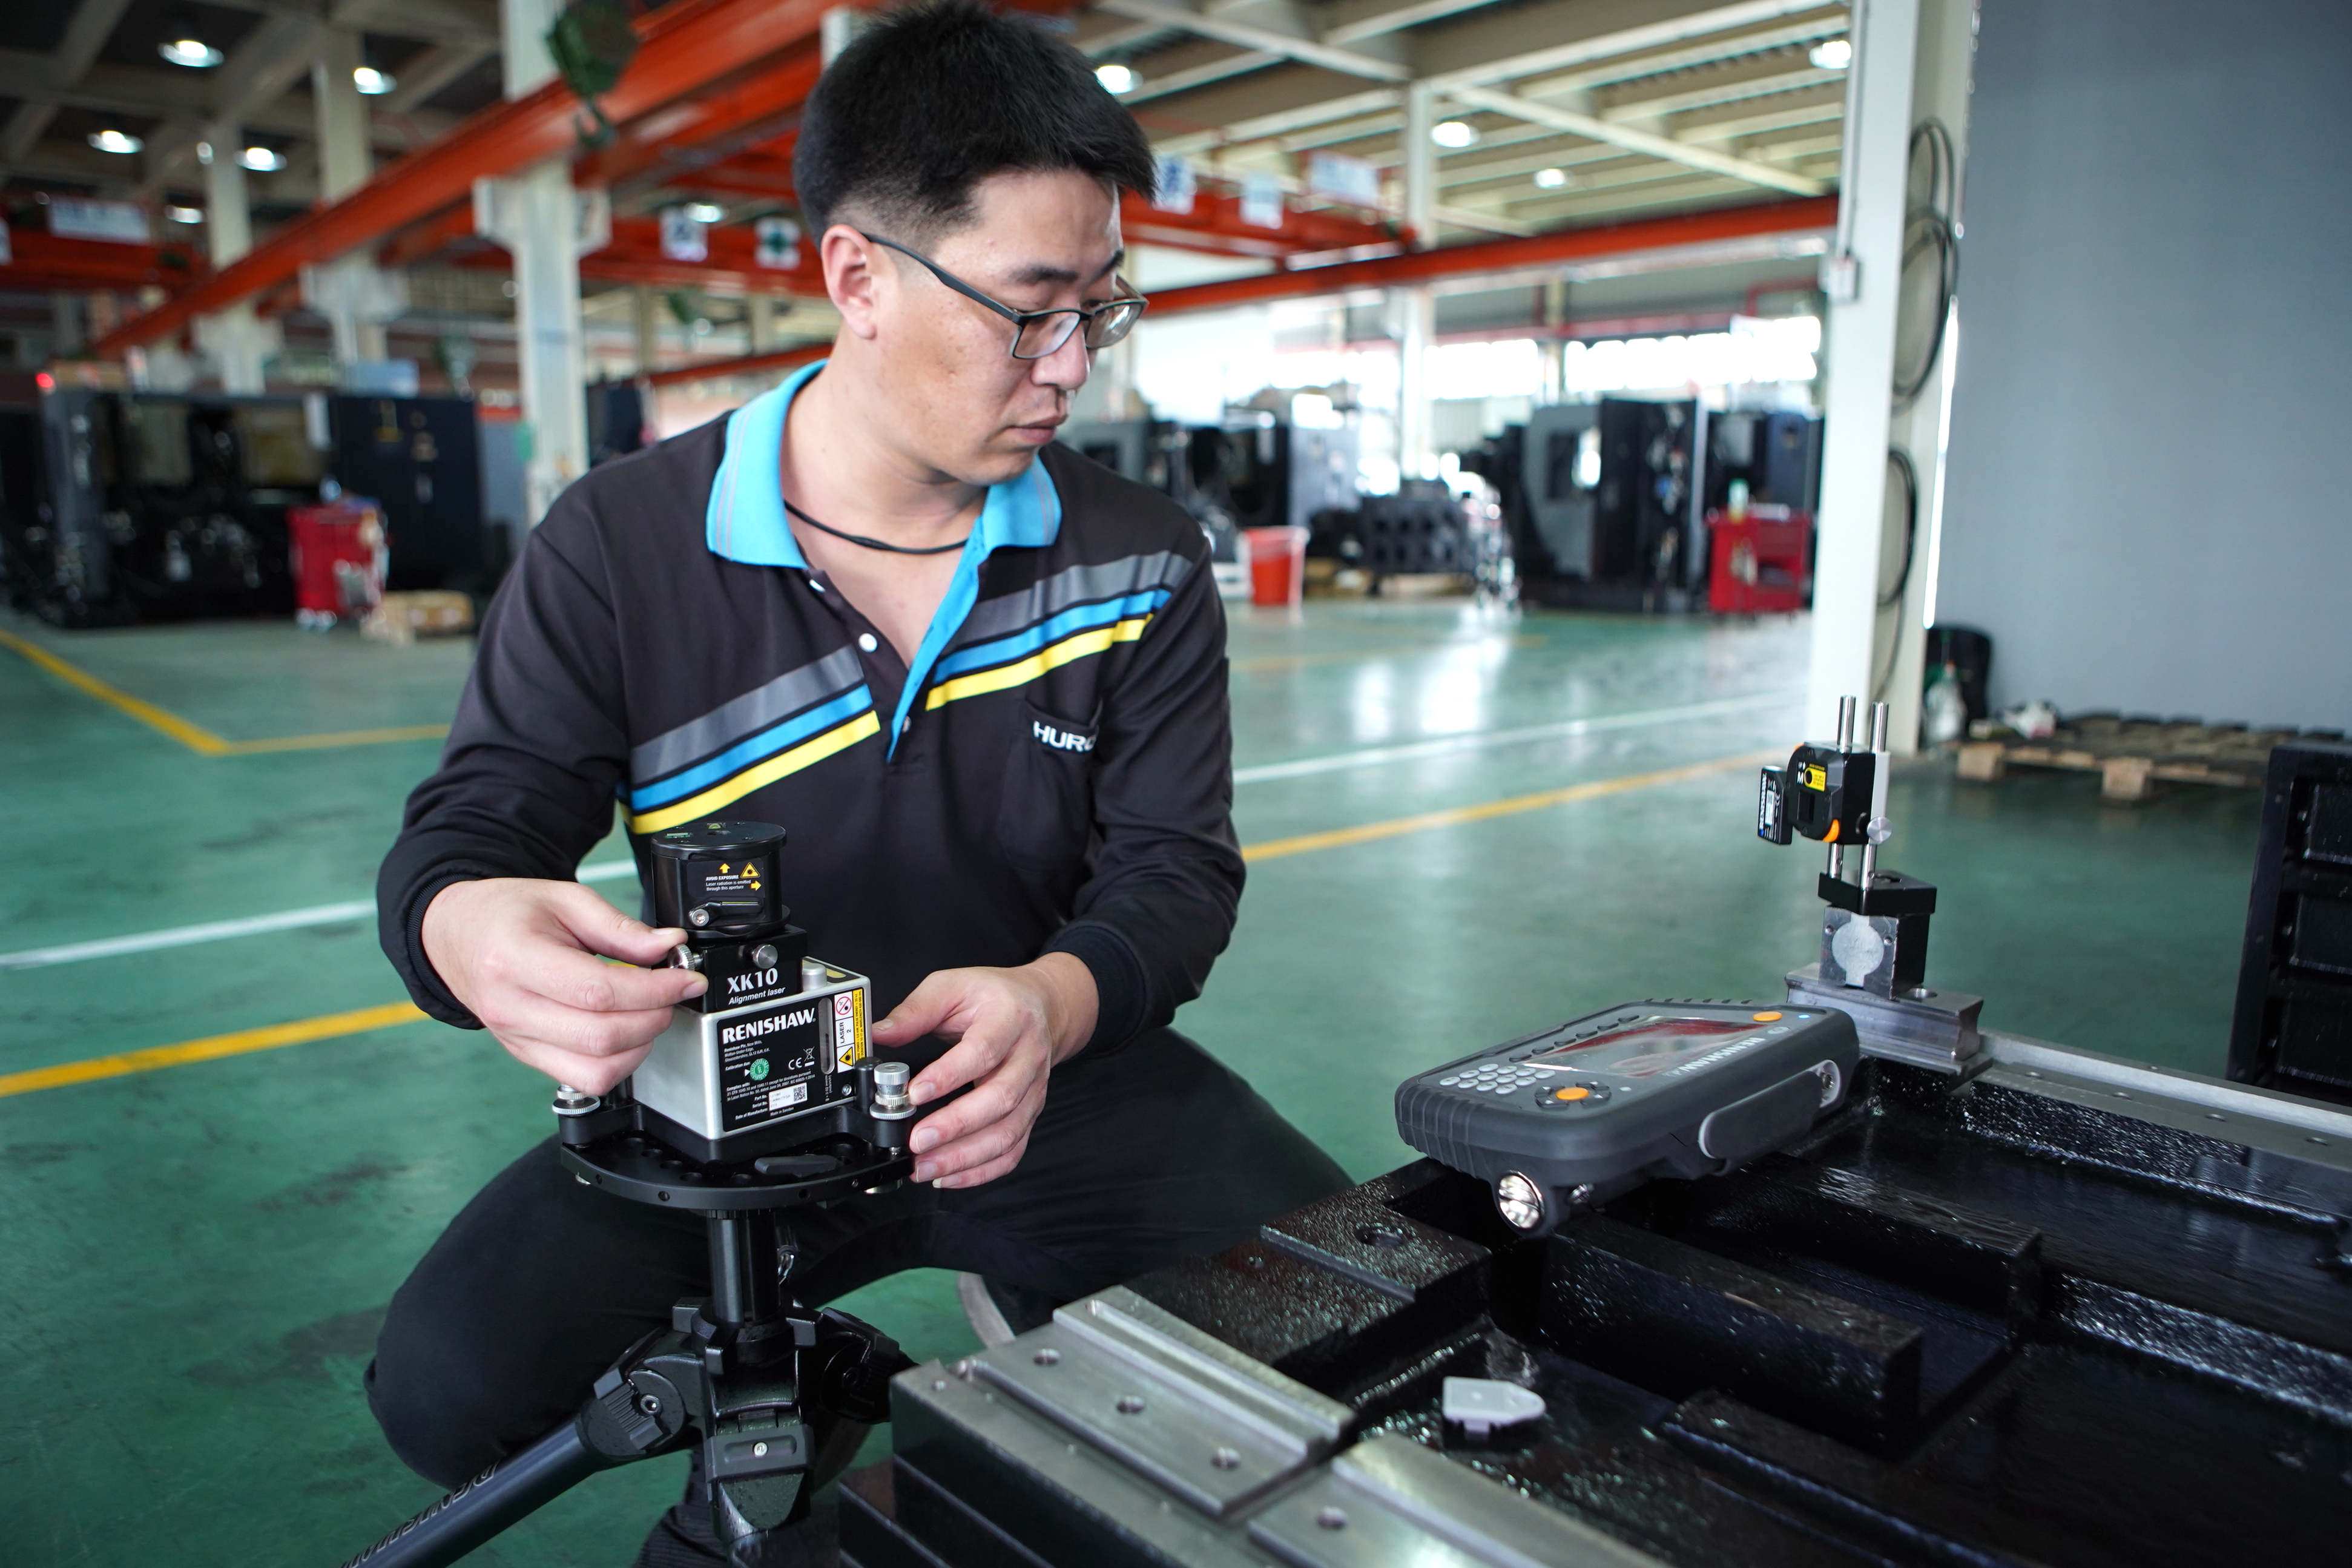
 The ultimate accuracy and reliability of a machine tool depends in no small degree on the alignment checking during its assembly. For machine tools produced in high volumes, the efficiency of the alignment checking process is paramount. Seeking an alternative to traditional error measurement techniques, Hurco Manufacturing Ltd. (Hurco) chose Renishaw’s XK10 alignment laser system to increase both precision and throughput.
Hurco is a global provider of CNC equipment, including 5-axis CNC machines, multi-axis CNC lathes, vertical machining centres and turning centres. Its worldwide customer base comprises precision tool, die and mold manufacturers, independent job shops, specialised short-run production manufacturing companies and OEMs of metal fabrication tools. The company’s product portfolio includes three well-known brands: Hurco, Milltronics and Takumi.
Hurco Manufacturing was established in Taiwan in 1999 and is today responsible for the manufacture and assembly of the complete range of Hurco machine tools. To ensure requirements for machine tool precision, safety and reliability are met, strict quality control is paramount for each step in the manufacturing process.
Challenges
With Hurco producing thousands of machine tools every year, increasing measurement efficiency was a vital driver for the company’s inspection and verification processes. Not only did machine measurement and alignment need to be highly accurate, it also needed to be faster.
 Alignment inspections during the assembly process were carried out by Hurco using a blend of traditional measurement tools, CMMs and state-of-the-art calibration equipment. The company had long employed a range of Renishaw solutions, including the XL-80 laser interferometer, QC20-W ballbar system and XR20-W rotary axis calibrator.
The sheer size and scale of cast machine tool components presented significant restrictions for CMM solutions, while the inherent weaknesses of traditional measurement techniques risked limiting operational performance. Wang Shun-Chien, Vice President of Hurco Manufacturing explained: “In the past, we have measured and aligned our cast products using coordinate-measuring machinery, but the larger dimensions of cast parts were always a limiting factor, and made it rather labor intensive.”
He continued, “We would also use traditional error checking tools like granite squares, dial gages and autocollimators during the assembly process, but these were never efficient enough, and the measurement results were too inconsistent.”
“When we needed to measure the parallelism of some large cast parts, if the granite square and guide rail are a distance away, then the dial gage needed to be extended to reach the granite, which would then cause any deviation result to amplify.”
Hurco set itself the task of identifying a more accurate machine tool alignment solution. One which was much less time and labor-intensive to set up and use, and which could replace the traditional measurement methods.
Solution
 Hurco chose to adopt Renishaw’s XK10 alignment laser system. The XK10 can be applied to linear rails to ensure they are straight, square, flat, parallel and level, as well as to spindles and chucks to assess direction and coaxiality of rotary machines.
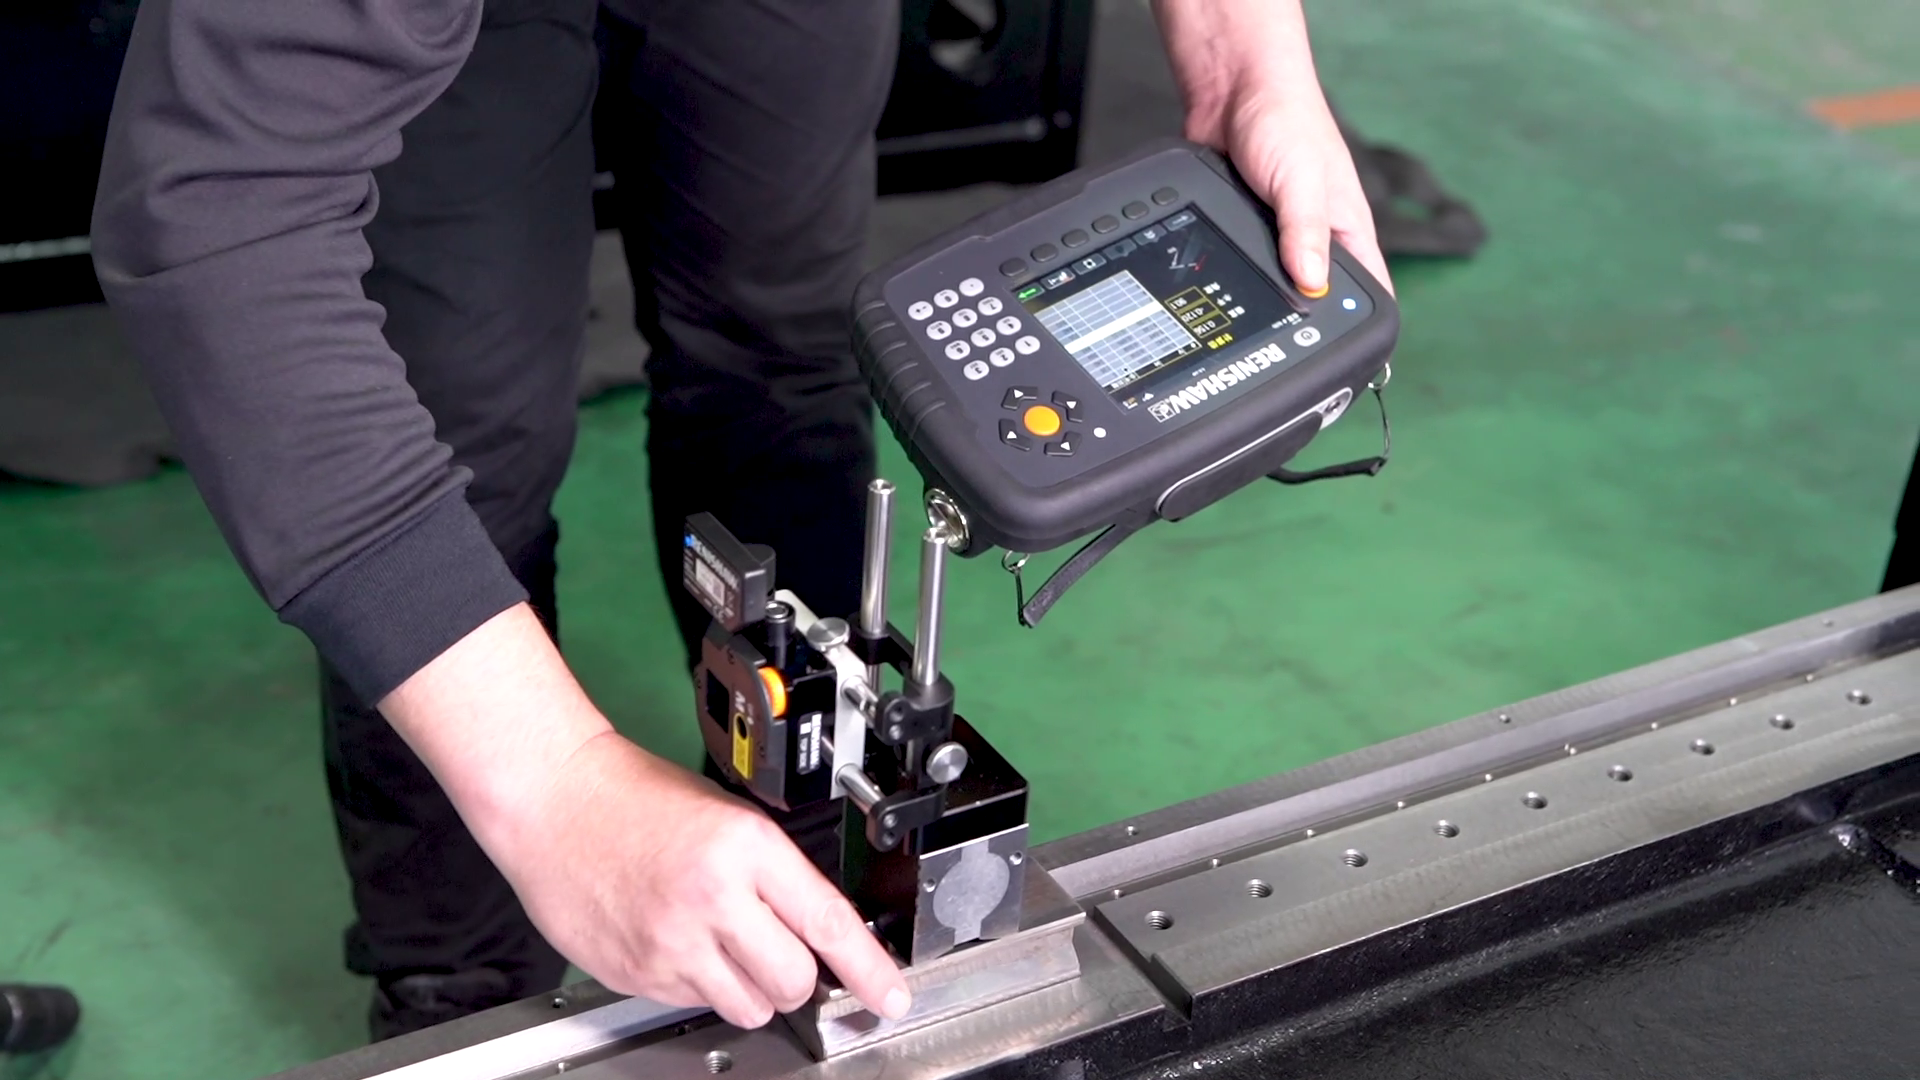
An all-in-one digital measurement solution suitable for a range of different CNC machine tools, the XK10 comprises a launch unit for primary laser transmission; wireless transmitter and receiver units; a portable display unit and a fixturing kit. An additional XK parallelism kit carries out parallelism measurements.
The XK10’s compact size, wireless connectivity and versatile fixturing means that it can be used in many different configurations, enabling detection and measurement of both geometric and rotational errors across all types and sizes of machine tool.
The display unit enables the operator to collect, analyse and record measurement data. It provides step-by-step instructions for each type of measurement, with intuitive graphics and real-time readings guiding the operator through each stage of the measurement process.
Unlike an autocollimator, which depends on the principle of converting angular measurements into linear measurements, the XK10 alignment laser system takes linear measurements directly, thereby removing the inherent conversion error. Importantly, breaking the XK10’s laser beam during data capture does not require a complete restart, unlike with a laser interferometer solution.
Hurco found that it provided a solution that is genuinely capable of replacing traditional methods.
“As a conservative estimate,” said Wang, “I’d say that Renishaw’s XK10 alignment laser system has at least doubled our overall measurement efficiency, and our evaluation process has proven that the measurement results tally precisely with those from high-precision coordinate measuring machines.”
With a measurement range of 30 m, the XK10 handles the requirements of many large machine tools. Negotiating the span between guide rails for parallelism measurements has become easy, removing the need for large granite squares and avoiding the deviation risk of hyper-extended dial gages.
Wang said that the XK10 has been useful in terms of the parallelism measurement between two measurement rails. “We align the laser unit and turn the laser beams through 90° with the XK parallelism kit. The system then automatically analyses the data collected and provides us with measurements of the parallelism between the two rails.
“By replacing various sizes of granite squares, the XK10 has also solved the problem of limited storage space and logistics. Thanks to its portability and flexibility, it is easy to take to site, performing precision measurements in real time. It is used for machine tool assembly, calibration and maintenance, and by enabling better understanding of the status of each CNC machine, resources can be allocated more effectively.”
For more information visit, www.renishaw.com/xk10.
Contact Details
Contact Details
Related Glossary Terms
- calibration
calibration
Checking measuring instruments and devices against a master set to ensure that, over time, they have remained dimensionally stable and nominally accurate.
- computer numerical control ( CNC)
computer numerical control ( CNC)
Microprocessor-based controller dedicated to a machine tool that permits the creation or modification of parts. Programmed numerical control activates the machine’s servos and spindle drives and controls the various machining operations. See DNC, direct numerical control; NC, numerical control.
- flat ( screw flat)
flat ( screw flat)
Flat surface machined into the shank of a cutting tool for enhanced holding of the tool.
- parallel
parallel
Strip or block of precision-ground stock used to elevate a workpiece, while keeping it parallel to the worktable, to prevent cutter/table contact.
- quality assurance ( quality control)
quality assurance ( quality control)
Terms denoting a formal program for monitoring product quality. The denotations are the same, but QC typically connotes a more traditional postmachining inspection system, while QA implies a more comprehensive approach, with emphasis on “total quality,” broad quality principles, statistical process control and other statistical methods.
- turning
turning
Workpiece is held in a chuck, mounted on a face plate or secured between centers and rotated while a cutting tool, normally a single-point tool, is fed into it along its periphery or across its end or face. Takes the form of straight turning (cutting along the periphery of the workpiece); taper turning (creating a taper); step turning (turning different-size diameters on the same work); chamfering (beveling an edge or shoulder); facing (cutting on an end); turning threads (usually external but can be internal); roughing (high-volume metal removal); and finishing (final light cuts). Performed on lathes, turning centers, chucking machines, automatic screw machines and similar machines.
