Driving the Tap: Turning Performance
The choice of tapping driver, the component between the spindle and the tap, can affect the quality and accuracy of the threads as well as the rate of wear on the tap and the…
Of the five basic factors that control the tapping process – the tap, the tapping fluid, the drilled hole, the gage, and the tapping device – the tapping device has the greatest influence on tapping performance. And the tap chuck is a crucial, and often overlooked, tapping-device component.
The tap driver plays a key role in the success or failure of a tapping operation and the overall performance and lifespan of the machine tool being used. No single style of driver can claim to be superior for all applications – great care must be taken to ensure that the right tap driver is chosen for a particular job. When choosing a driver, remember that it doesn’t operate in a vacuum. It’s simply the component marrying the tapping device’s shank end, which goes into the machine spindle, to the tap end, which holds the tap. All three tapping-device components must be given equal consideration.
The Shank End
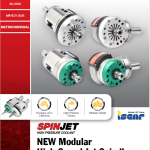
The choice of tap-driver shanks, which come in Morse taper, straight, automotive, Jacobs, CAT V-flange, and BT-flange styles, typically is dictated by the spindle of the machine in use. However, manufacturing-process and tool-management issues may lead one to consider a modular connecting system that permits easy substitution of different-sized shanks, so that a user won’t need one $400 tap chuck for machines with CAT 40 spindles and another for machines with CAT 50 spindles (Figure 1). Modular systems enhance tool utilization and speed changeovers, but their longer length compared to integral systems can make them less rigid. The longer a tap must be extended to clear a fixture bracing, the greater the chance that it may whip in a large arc and not line up with the hole. This is detrimental to the first cutting teeth on the tap chamfer. Solutions to this problem include machining a bigger chamfer in the hole, using a solid tap chuck (rigid tapping), or eliminating the need for extending the tap by making minor changes to the work fixturing. For example, by beefing up selected parts of the fixture, one may be able to eliminate braces that interfere with the tapping assembly.
The Tap Chuck
Choosing a tap chuck style is more complex than choosing what type of shank it will have. No single driver style is correct for every situation. Let’s look at the types of systems available.
Synchronous tapping has become a very popular option in recent years. For NC machining centers built with this option, programmers need input only a tapping cycle and the tap size. The program is simple and the tooling inexpensive. One must use a solid, accurate chuck with no axial movement (Figure 2). This system is best suited for slow-rpm, moderate-to-low production of tapped holes larger than 3/8″ in diameter. The quality of the tapped hole produced by this system depends greatly on the accuracy of the machine tool’s spindle, leadscrew, and electronics.
Tension/compression tap chucks use a spring-operated axial float mechanism to compensate for differences in machine feed and tap lead rates (Figure 3). Every tap has a fixed feed rate that is equal to its lead. For example, a 10-32 tap has 32 threads per linear inch. It will advance exactly 1″ in 32 revolutions. This translates into a lead of 0.03125 ipr (1″÷32). The machine tool feed rate must precisely match the lead rate to cut accurate threads. Until the advent of synchronized feed controls, most machine tool controls were unable to execute these rates precisely. Before synchronous tapping was introduced, tension/compression chucks were designed to compensate for these differences in machine feed and tap lead rates. They incorporate a spring design to regulate the movement of the internal mechanisms. The inner slide of the chuck can be extended (tension) or compressed (compression) to let the tap advance at its fixed lead rate using only its own rotation to guide it.
Figure 1: In this modular tap-shank adapter, the locking screw is at a 5° inclination to match the 5° whistle notch on the tap-chuck shank. This prevents axial pull-out or radial slippage due to torque.
Figure 2: An Intertap solid-drive tap chuck for synchronous tapping.

Figure 3: A tension/compression tap chuck.
But sometimes if the hole is improperly prepared, the tool may compress before the tap begins to cut threads, producing inconsistent thread depths. To avoid this malady, try machining a bigger chamfer in the hole to help guide the tap, or use a hard-start tap chuck (which resists compression) or a tension-only tap chuck (which has no compression). Tension/compression tap chucks in use on transfer lines need to have enough compression to handle holes that are not drilled deep enough or, because of a broken or missing drill, haven’t been drilled at all.
Tension-only tap chucks are designed for parts that require accurate depth control. These tools are manufactured with no compression; when the machine feeds the tap into the workpiece, the tap has to start cutting unaided.
If the surface plane of the part is not at a consistent height from part to part, then the first chamfer teeth of a tap driven by a tension-only tap chuck tends to take more shock when entering the hole. This causes premature wear. A tension/compression tap chuck might seem like a logical solution, but this type of chuck wouldn’t necessarily provide accurate depth control. A better idea is to use a hard-start tap chuck that will give if the surface plane has changed or to qualify the surface-plane location prior to tapping the hole.
Hard-start tap chucks, which provide adjustable resistance to compression, are the most popular style of tension/compression chucks. When thread depth is critical, the hard-start feature ensures that a tap will begin to cut at the same point on every hole and, thereby, produce consistently accurate thread depths. This feature is particularly helpful when using a tap that has dulled. Modular tension/compression and self-releasing chucks have an adjustable hard-start-to-compression feature (Figure 4). This provides enough resistance to start a dull tap while still being able to compress for safety when needed. To adjust the hard start, turn the hex screws on the tool’s barrel clockwise for increased resistance or counterclockwise for decreased resistance. Integral shank tension-only and self-releasing chucks provide a solid hard start but no hard-start adjustment or compression feature.
Also in this family of tension/compression tap chucks is the self-releasing driver, the most versatile tap chuck style (Figure 5). It can be used effectively on machining centers and turning machines to produce accurate threads when tapping either blind or through holes. Most self-releasing chucks will consistently stop tapping within 1/10 of a revolution. These chucks are especially useful on turret lathes, where it’s difficult to stop and reverse the spindle accurately.
Figure 4: A tension/compression tap chuck with an adjustable hard start.
Figure 5: A self-releasing tap chuck.
The inner slide of the chuck drives the tap into the hole until the slide reaches the end of its tension stroke. It is then “released” into a neutral position, and the tap stops cutting. The tap is then driven back out of the hole by reversing the machine spindle. This provides an accurate method for controlling thread depth and prevents the tap from hitting the bottom of a blind hole.
When tapping through holes, the chuck is operated as a tension-only or tension/compression chuck, depending on the model, because the self-releasing feature is not used.
The following are operating suggestions for self-releasing tap chucks:
Through-hole tapping:
- Turn the machine spindle at the required cutting speed.
- Set the machine feed at about 95% of the tap lead.
- Feed the tap into the drilled hole.
- When the tap reaches the desired depth, reverse the machine spindle (don’t dwell). Retract the tool from the hole at about 95% of the tap lead.
Blind-hole tapping:
- Turn the machine spindle at the required cutting speed.
- Set the machine feed at about 95% of the tap lead.
- Set the feed-stop depth at the required thread depth minus the length of the tension stroke (stroke to disengage).
- Feed the tap into the hole. When it reaches the feed-stop depth, continue to rotate the spindle (dwell or feed hold). The inner slide of the tap chuck will be pulled toward the part by the tap. The tap will continue to feed itself into the hole for the length of the tension stroke. At the end of this length, the drive mechanism will release into neutral and allow the tap to free-spin and stop cutting.
- Reverse the spindle to thread the tap out of the hole. Set the machine feed rate at 95% of the tap lead. The tap chuck will automatically reset itself for the next hole.
Because the tap is fed into the hole at 95% of the tap lead, some of the tension stroke will be used before the feed-stop depth is reached. Therefore, the above instructions are to be used as beginning points. After a trial run, measure the thread depth and make adjustments to match part specifications. Read the operating instructions included with the chuck for more specific information.
Self-reversing tap chucks are a good choice for the large-volume production of tapped holes smaller than 1/2″ in diameter (Figure 6). There are reversing systems on the market today that will tap holes up to 3/4″ in diameter, but these larger capacity systems are not as popular as other large-hole threading methods such as synchronous tapping and thread milling. Reversing tap-chuck styles include styles for manual machines such as Bridgeports, heavy-duty styles for radial-arm drills, and styles for machining centers.
A reversing chuck incorporates a transmission that permits reversal of the tap without reversing the machine tool spindle. A reversing tap chuck’s spindle weighs ounces, while a machine tool spindle weighs 40 lb. or more. Therefore, reversing a tap-chuck spindle requires much less force and subjects the machine tool to far less wear.
The advantages of a self-reversing tap chuck become more pronounced when tapping holes smaller than 3/8″ in diameter. For these small holes, an NC machining center programmed for a synchronous tapping cycle at high rpm does not guarantee that the actual speed in the cut will reach the programmed speed. The acceleration and deceleration of the spindle every time the spindle changes direction reduce the average speed attained by the machine before it must change direction again. For example, a 10-32 tap machining a 1/4″-deep hole at 3000 rpm will reach the programmed depth in less than 0.5 second. At the bottom of its tapping stroke, the machine has to stop the spindle, reverse the spindle, and then start it up again. After stopping, the machine spindle would have to reach 3,000 rpm in less than 0.1 second to beat a self-reversing tap chuck.
So why not use a reversing chuck on all parts with tapped holes? The main reason is cost—reversing tap chucks are more expensive than tension/compression or solid tap chucks, and, therefore, they aren’t cost-efficient for short runs. From a tool-management viewpoint, the stop arm on a reversing chuck requires more space in the tool drum. Also needed is some type of stop block or stop arm mounted on the machine tool to keep the outer housing stationary.
When using a reversing tap chuck, remember to program the tool at least 0.4″ off of the work surface. This clearance will allow the tap to clear the workpiece on retraction. As with other systems, program the feed rate at about 95% of the tap lead. Feed in and out without a dwell, use the machine’s bore cycle, and disable the machine’s feed and speed overrides. Programming at 95% feed will allow the tool to lead the feed of the spindle, providing better depth control.
In terms of maximizing machine tool investment, the reversing tap chuck will tap small holes faster, with less machine-spindle wear than other methods. Also, constant-speed tapping will lengthen tool life.
The Tap End
Figure 6: A modular-shank conventional reversing tap chuck.
Collets, rapid-change adapters, and 3-jaw chucks may be used to hold a tap in the chuck. However, tapping exerts a lot of torque on the tap, and the tap may slip in any holding device. To combat this tendency, drive off the square of the tap. While some collets rely on adjustable driver blocks in the bottom of the chuck, and some have small drive plugs that drop down into the bottom of the collet, these styles take extra time to use and will increase the overall time needed to make a part. A preferable tap collet is one that has the tap driver built in without additional drive pins or drive blocks. The inherent drive between the collet’s taper and the chuck results in high performance.
Tap adapters permit fast and accurate tap changes. They can be bought with built-in torque control to help eliminate tap breakage. This feature is especially helpful when tap breakage in an almost-finished or expensive part would be costly. Tap adapters also may be used for through-the-tap or around-the-tap coolant application. The latter feature is helpful for taps used for through-hole tapping or for taps that are too small to support a through-tap coolant hole.
Machinists can choose from a wide array of tapping-component combinations to achieve high-performance tapping. There is no one system that is best for all applications. The volume and nature of a shop’s machining operations, the types of machines available, and the characteristics of the components being manufactured will help guide the choice of the tapping system to use for a given job. The tooling supplier should be able to provide the best advice and a wide variety of tapping systems.
About the Author
Doug Moore is a product manager, tapping and boring, Machining Center Product Group, at the Metalworking Systems Division of Kennametal Inc., Raleigh, NC.


MFGAxis Discussion