Efficiently manufacturing using 3D optical metrology
Efficiently manufacturing using 3D optical metrology
Woodward Inc., with over 50 years of heritage in the aerospace industry, develops and delivers motion control and integrated propulsion systems. Much of Woodward's success can be attributed to an approach of applying total system solutions in meeting the needs of customers and staying at the forefront of served industries.

Article by Zygo Corp.
Woodward Inc., with over 50 years of heritage in the aerospace industry, develops and delivers motion control and integrated propulsion systems. Much of Woodward's success can be attributed to an approach of applying total system solutions in meeting the needs of customers and staying at the forefront of served industries.
Michael Schmidt, Market Development Manager, Zygo Corporation
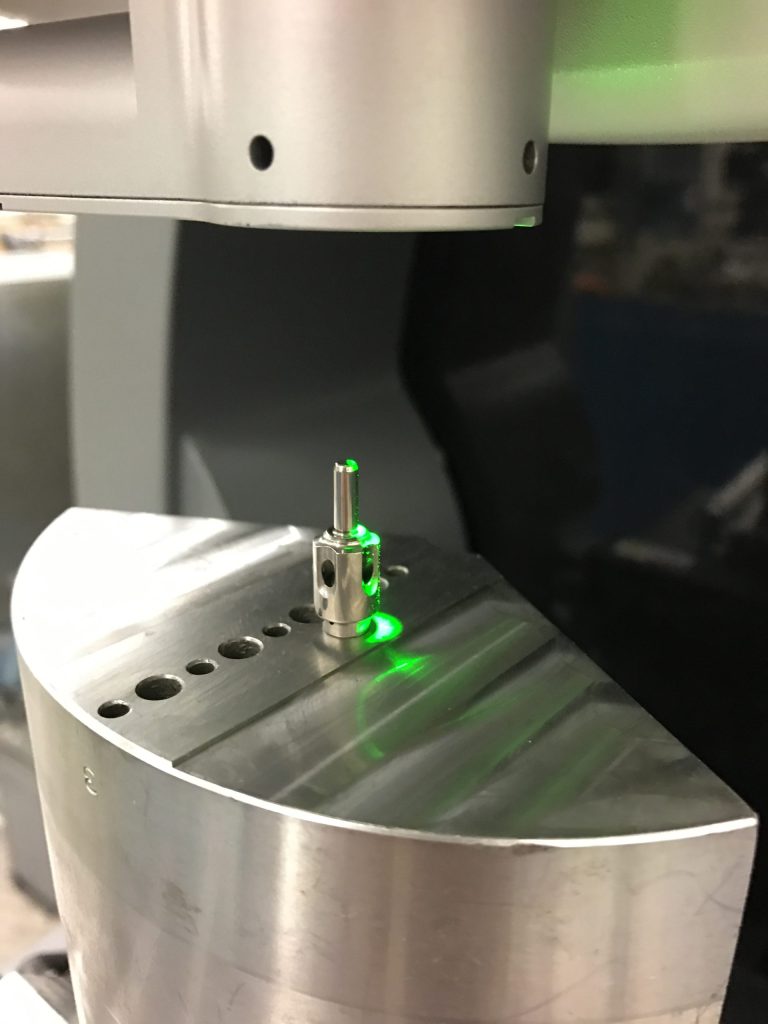
Woodward Inc. works with leading optical metrology instrument supplier ZYGO to "tune" their manufacturing processes by leveraging precise 3D surface data. In many cases, the insight gained by utilizing 3D optical metrology has improved Woodward's component design, quality, and overall product performance. Through this technology, Woodward has been able to identify key characteristics of its manufactured surfaces that result in a real differentiator in the markets it serves.
We caught up with Jack Clark, who currently leads the 'Materials and Surface Engineering' group as a Senior Scientist in the Woodward Technology Development family. Jack's group focuses on developing surface finishing processes that are specific to the role of a particular component to ensure proper function, reliability, and potential cost savings. Varying materials and machining processes necessitate confirming the inspection of production lot samples quickly and efficiently to confirm that manufactured parts meet or exceed specifications. To accomplish this, the Materials and Surface Engineering Group relies on instrumentation and software which meet their stringent manufacturing demands and deliver the functional measurands necessary to control critical part performance.
3D OPTICAL METROLOGY
To meet Woodward's exacting applications and requirements Clark prefers to use 3D optical metrology instruments. "Many of the advantages of 3D optical metrology start with being able to gauge the component in all dimensions, and the entire functional area. That is why we refer to 3D optical metrology as 'areal.' You are characterizing the entire part or region of interest (ROI), not just segments of it, as you do with 2D (linear measurement) lines. 3D optical metrology enables much faster data acquisition. Data for an entire ROI can be collected simultaneously, instead of one data point at a time. Also, the measurements are more repeatable because users are including so many more data points, allowing the local part uncertainties to be a smaller percentage of the overall measurement than that of 2D", Clark explains.
Manufacturing processes are multidirectional. A single line profile (2D) 'sees' the process from only one direction and cannot visualize the gauge-able process variations in any other dimension. The manufacturing process will vary in many dimensions, and that is why it is essential to capture all the pertinent data through the use of 3D optical metrology. 3D optical metrology can report form deviation, thickness, parallelism, roughness, leak paths, edge radii, defects, etc. all in the matter of a few seconds, with one instrument, in one set-up. This single instrument can replace two to three alternative gauges that may not necessarily report the same required functional information.
Clark continues, "Manufacturing is slow to change, and despite the inherent advantages of 3D optical metrology, there is still some resistance to replace legacy solutions. 2D metrology — especially profilometry and CMM — is the standard throughout manufacturing, and the ISO and ASME GD&T and surface standards were developed around the 2D measurement methods of the day. However, times have changed, and now there are 3D and areal standards to control those measurements and allow designers to put 3D callouts on drawings."
"Effectively, manufacturing's resistance to this paradigm shift is because of not being familiar with the tremendous advantages of 3D metrology, and a lack of understanding of the 'function' of the components they produce and what must be measured to ensure functional parts and assemblies. Therefore, adapting to new manufacturing methods and metrology is sluggish. Engineers and scientists in companies are not being allowed to 'get out there' and see the new world that has evolved and is passing them by", states Clark.
Today, integration of 3D optical metrology is well established in research laboratories, shop floor metrology cells, fully-automated manufacturing and assembly lines. Optical metrology is fast, repeatable, and requires little maintenance — allowing it to be used in all phases of manufacturing metrology and process control. There are many aspects of the manufacturing process for which 2D contact gauging may not be the best option. For example, an artifact that occurs randomly would likely be missed by a single line trace but would easily be detected by a 3D instrument that characterizes the entire ROI.
Knowing for sure that the manufacturing process as a whole has been characterized is vital. Not only for adherence to drawing specifications, for example, but detecting manufacturing process issues such as machine tool vibration due to a "bad bearing," poor tool set-up, or worn cutting inserts. All these can be characterized with 3D optical metrology, and subsequently controlled by the manufacturing team.
METROLOGY AT WOODWARD
At Woodward, Clark specifies the use of ZYGO 3D optical metrology instruments in particular. "The criteria for the choice of any metrology instrument is extensive. In terms of reliability and uncertainty, ZYGO instruments are proven to produce less noisy data and are faster in data acquisition and analysis. (Data collection and analysis time is critical in automated applications.) On ZYGO instruments, long-term instrument reliability is outstanding, which results in consistent long-term results. Plus, the software is designed specifically for manufacturing applications and conforms to international standards. ZYGO is also adept at providing 'special equipment and function' to accommodate demanding metrological applications, part handling, and varying surfaces that can cause uncertainties in optical measurement. ZYGO's instruments are also flexible to change over for the multitude of applications appropriate for this technology."
Woodward uses a range of ZYGO 3D optical profilers, a Verifire™ laser interferometer, and distance measurement systems for a wide variety of applications including:
- surface roughness and waviness
- flatness and parallelism
- height/thickness measurements
- edge radii
- component wear (life testing)
- material porosity
- corrosion characterization
- material failure analysis
- coating thickness
- burr characterization
- defect detection and classification
- GD&T, where applicable
Woodward's dedication to reliable metrology helps ensure critical parts and assemblies will function as designed with the reliability their customers expect.
ZYGO's 3D optical metrology instruments have also made a significant impact on other aspects of Woodward's manufacturing operations. For example, the company uses areal measurements to examine and analyze component wear. Combining the 3D data with in-house scanning electron microscopy information, Woodward can determine the root cause of an issue more quickly and more precisely than using either method independently. Also, the company has been able to "tune" its manufacturing processes using the 3D data. In many cases, insights into the surface quality and process control have improved Woodward's overall product performance. The company has been able to identify key characteristics of its manufactured surfaces that, when monitored by 3D non-contact inspection, result in a real differentiator in the markets served.
As for choosing the optimum provider for 3D metrology instruments, Clark explains, "When we finally needed to fix on one supplier for all of our metrology needs, we chose ZYGO because the company supplies specialized optics (and other hardware) to accommodate various areas of interest and resolutions required to gauge the components. ZYGO is [also] an optics manufacturer and therefore, can design and build many instrument components that are specific to the metrological/application task. There are other metrological instrument companies that can integrate components to produce a solution, but ZYGO has capabilities to create new designs to satisfy more sophisticated customer expectations. Also, ZYGO's data acquisition speeds outperform the competition, and the company's data analysis is a crucial differentiator between instrument suppliers. Apart from adhering to the 'standard' algorithms to produce 'standard' measurements, ZYGO provides tools to segment/parse the data to produce functional results that other suppliers cannot. The metrologist must be aware of the functional characteristics that can be reported via ZYGO software tools and use that knowledge to help decide what instrument to specify for a particular application."
Clark continues, "ZYGO has been and will continue to be a strategic partner in Woodward's quest to be an example of the best use of advanced metrology. All 'standard' and technically demanding non-contact applications are supplied by ZYGO. We are continuously working with their application engineers to expand the technologies offered. This close relationship allows Woodward to implement the advantages of non-contact, interferometric 3D methods throughout our manufacturing and reap the benefits of improved quality and component performance."
He concludes, "Many times, problem-solving and development does not come at a fast pace. When you have a solid, intimate relationship between companies, great accomplishments are produced in a timely manner to help both companies thrive. We have individuals in both companies that are dedicated to offering feedback and requirements, interacting together and coming to a metrological solution that supports Woodward's needs and, in many cases, expands the offerings of ZYGO."


